How To Flush a Tankless Hot Water Heater
It is important to flush with proper food grade, such that you may use it once every 12 to 18 months, with vinegar.
Taking some time and performing the maintenance improves the life and efficiency of your water heater. It is the right time to clean inside the tankless water heater air filter as well, while you consider flushing.
A tankless hot water heater flushing procedure may take an hour to complete the process. If you want to learn more about water heaters, here is an article I wrote about water heaters. I encourage you to read it!
How Often Should You flush A Tankless Water Heater
A tankless hot water heater heats on demand without storing in the tank hot water. The manufacturers of tankless water heaters recommend flushing a tankless hot water heater once a year.
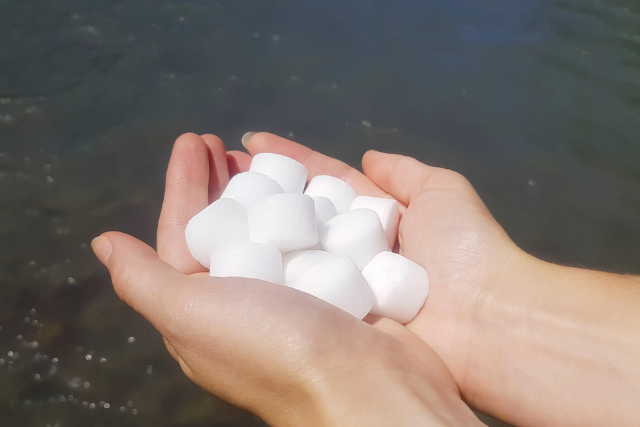
This eliminates the calcium and other minerals buildup within the unit. The chances are more when you receive more hard water.
How Much Does it Cost?
Flushing your tankless water heater is not expensive at all if you decide to do it all by yourself.
This materials needed are mostly household appliances apart from the submersible pump. Based on the items needed, your total expense would be less than $150. If you decide to hire a plumber it would definitely cost more.
Steps To Flush a Tankless Hot Water Heater
Performing a tankless water heater flushing means following the instructions given to you. However, the instructions are mostly the same and apply to all types of tankless water heaters.
Step 1: The first step is to gather your materials. For this, you need a few things:
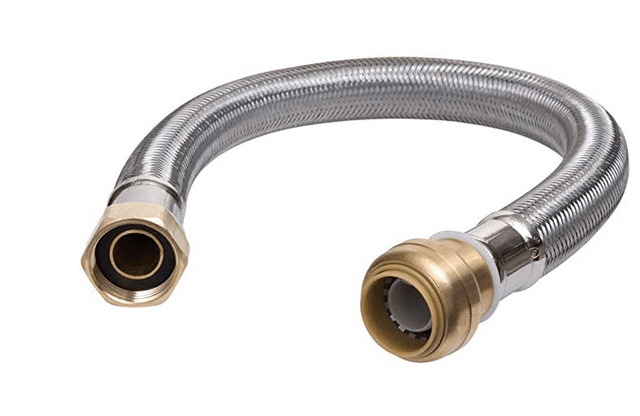
- Two washing machine hoses in stainless steel.

- Five-gallon bucket
- Four or five gallons of food-grade, white vinegar. You may buy it at any grocery store.

- A submersible pump.

You will also need a non-contact electrical tester, screwdriver, a small pump or pond pump, and an adjustable wrench.
Warning
Never flush the hot water heater before you turn the power and the gas off. If you forget, it will damage the entire unit. It is also a must to check the power source of your unit.
You can understand if it is powered by more than one. Check if the power is off using a non-contact electrical tester and continue with the flushing of the system.
If you forget to turn the power resources off, flushing may cause severe damage to your unit.
Step 2: The second step is to identify the Shutoff Valves.
This is mostly found under your tankless hot water heater. You can see they come in color-coded handless. These levers normally shut off the flow of water and gas to your tankless water heater.
When they are in line it means the levers are on and if the levers are perpendicular to the pipe, it is an indication that the hot water heater is off.
In this way, you will shut the gas off. It means the yellow handle, the blue handle that intakes cold water, and the red handle offering the hot water flow.
Shutting off the gas means moving to the right side of the handle towards the silver pipes.
After all these, it is the right time you can unplug from the wall socket your unit.
Step 3: Take off the cold water valve.
You can see the blue and red levers as the service valve. You must turn the levers such that it is perpendicular to the pipe. Later, shut off the water coming to the tankless hot water heater.
It is now convenient and right to unlock the service valve. However, you can get the materials ready, and keep them handy.
Note: An external pump is attached near the floor to the wall. Thus, the electronic components can be seen at the device top, through the vents.
You should ensure there is no water on the device. It is a must to double-check so that it does not cause a short circuit.
Keep the bucket ready so that you catch the water coming out of it. Though it is not much, yet you do not want it on the garage floor. Besides any trickling water out of it will be in the bucket.
You can also do a thing is place one of the hoses that are available with the kit and set it ready.
You can place it to one end of the bucket so that as you unscrew the valve cap, you can quickly plug into the opening the hose and redirect some water into the bucket.
On completing the side of cold water, you can do the same with the side of hot water. Be cautious, from not burning yourself.
If you have not been making much use of the hot showers, washing machine, or running the dishwasher, before starting the flushing process, has to be taken into consideration.
It is because the water coming out of the service valve of the hot water heater may be hot. It is based on the time your tankless hot water heater is sitting idle to determine how the hot water is coming on the hot side through the service valve.
You may unfasten slowly the service valve if you find it is hot and avoid burning your hands.
You can keep the hose and bucket ready for the valve of cold water and unlock the service valve of hot water until it leaks water.
When you notice the water is not hot or is just warm, you may unlock the service valve, plug the hose and allow the water to drain completely into the bucket.
Note: The side of hot water comes out faster and in a larger quantity in comparison to the side of the cold water.
Step 4: Connection
Now that you have put into use the hoses you may connect following the earlier step to the service valves and it will be all set to proceed to the next step.
You may empty the water that you have collected in the 5-gallon bucket from the service valves.
You may fill with food-grade of 4 gallons of white vinegar in the bucket. Get any generic brand or original ones; attach the service valve (blue) to the sump pump top. Ensure the connections are tight and do not get unscrewed, but wait and do not plug the pump.
Place into the vinegar the pump before plugging it into the wall. You can find no on or off switch. Thus, you can see it turns the moment you plug them in the wall socket.
Likewise, before plugging into the power outlet the sump pump, ensure the hose entering the service valve of hot water is securely attached, while the other end is with the sump pump placed into the bucket.
There is no need to screw it into the pump. It is enough to place it loosely in the vinegar bucket.
Thus, the pump is immersed in the solution of vinegar and also the attached hoses, which means you, are set to start.
Plug the pump now into the power outlet. It begins to circulate vinegar through the service wall of cold water (blue) and the service valve of hot water (red) into the vinegar same bucket.
The recommended is to leave it together for 60-90 minutes at least. Even if the instruction manual says to keep it for 45 minutes, you may place it for 60 -90 minutes, keeping it longer is helpful.
Step 5: Now that the vinegar is going round, you may use this time and clean the air intake filter.
There is a need to clean the intake filter. You may have been noticing on your display some error message reading. It indicates air intake filter cleaning.
This filter is positioned within the tankless hot water heater.
However, it is not tough to reach everything, but you can remove first the faceplate of the tankless hot water heater. It can be held with 4 screws together, such that 2 is on the bottom, while 2 on the top.
Removing the faceplate helps you to unscrew first all the screws. It allows to unhook the faceplate top or to lift upwards the top from the frame of the tankless hot water heater.
It will expose the hot water heater interior part. Next to it is the air intake filter with a single screw. You may remove it by loosening the screw.
Pull it towards you and slid to the left the entire thing. Slightly angle it over the motor and remove it.
After removing it, place it under a full blast of water and ensure rinsing it thoroughly that your filter should be clean. You may dry it using paper towels.
Once it is dry you can reinstall the same way you removed the filter out.
All it requires for the replacement is the faceplate of the tankless hot water heater. With it allow the pump to run for 60 to 90 minutes.
Avoid plugging the tankless hot water heater until you do not complete the process of flushing. Once you complete plug it into the outlet.
Step 6: Rinse out the vinegar
As the pump circulates for 60 to 90 minutes the vinegar, you can get ready to rinse it out of the tankless hot water heater. You may unplug the pump from the wall, and take the sump pump out.
Allow it to immerse into the vinegar bucket and then place it aside. You may dump into the toilet the vinegar and avoid throwing it on the plants or grass so that the foliage is safe.
Use an empty bucket such that you keep it under the tankless hot water heater. Place the bucket such that you unscrew from the (blue) cold water side of the hose.
Replace the cap of the service valve and screw it. Leave the attachment of the hot water hose.
Open the lever controlling the inflow of cold water and allow it to flow for nearly 4 to 5 gallons through the tankless hot water heater and also ensure it is into the bucket out of the hot water hose.
Then, close the valve of cold water.
It is time to check the water filters. Use the fingers and unlock them. You can see water coming out of some showing the use of hose for the (blue) the cold water side and how handy it was to redirect the water into the bucket back.
Remove the filters, check and clear the debris, rinse the filters using water and get them back by screwing them.
Step 7: Reassemble the heater
Now your tankless hot water heater is descaled thoroughly and your intake air filter is perfectly clean that you can conveniently reassemble everything.
Without fail screw tightly all the service caps and then consider the opening of valves.
If you feel sure that everything is tightly capped, you may begin opening valves. It is always recommended to initiate the cold water valve.
Once you hear water rushing, you can open the hot water heater valve. Follow it with the gas valve and the central circulation (yellow) valve. Then, plug in the tankless hot water heater.
As you see the display on the machine, you can notice on the display certain icons. It is done so enjoy the smooth working. The advantage is that this flushing process eliminates the calcium and limescale deposits built up within the hot water heater.
Helpful tips for tankless hot water heater maintenance and cleaning
- You get to enjoy on-demand hot water. It is best to install a tankless hot water heater. You also save around 50% energy in comparison to the traditional tank water heater.
- There is a need for annual flushing as per the manufacturer’s recommendation. You may decide flushing as per the area you live in and the hard water quality that you receive. Check the municipal water reports to know about the hard water.
- Exterior maintenance is a must; use a soft cloth and a non-abrasive cleaner to prevent rust and to keep it free from dust. Check pipes in cold weather and watch out for splits or cracks in the insulation.
- Also, test the pressure relief valve if your tankless water heater has one. If not, take the assistance of your plumber to know about your water heater.
Flushing ensures no risk of explosion. The sediments are out and the heat exchanger works more than necessary. It works efficiently and prevents problems.