How to Clean a Water Softener Resin Tank
A water softener is an essential home appliance that keeps minerals that you don’t want in your tap water. Because these minerals can cause staining in your pipes.
A water softener works by absorbing all these unwanted minerals using resin beads and also replacing them with sodium ions before the water goes into your home.
It is quite efficient and makes getting your potent water into your home easy. However, the resin tank can experience a buildup of minerals.

The real water softening actually happens in the resin tank. This shows how important the resin tank is and why it should be cleaned.
The resin tank is likely to have a buildup of calcium, magnesium, and other minerals. Hence, the need for regular cleaning.
However, the best time to clean a resin tank, if you should, is when the slat level is low, this way, you won’t have a rough time removing the massive salt content.
READ: Best Water Softener For Apartments
How to Clean Out a Water Softener Resin Tank
There are ways you can use to clean your resin tank. That is if your unit has not been in use for some time.
If you also notice a change in the color of the water or if the water tastes unpleasant after passing through the softener, then you should clean your tank.
If you suspect that there is microbial or bacterial contamination or a foul smell then you need to clean the tank. If you aren’t satisfied, you can decide to carry out a bacteria test and if it shows that the water supply has been contaminated, then you need to clean the tank.
Meanwhile, the manufacturer’s recommendation on cleaning the softener unit varies. Some are from every three months or yearly.
There are different ways or approaches you can use to clean the tank. First, you will need to disconnect the water softener system and take out the tank.
That is the resin tank. You can also do this by detaching the valve by unscrewing all the bolts then, clean your tank with the aid of water and bleach. Then reinstall, after work.
READ: How to Bypass A Water Softener System
You can also clean your tank by applying iron-based products available at your local store.
How do I clean my water softener resin tank?
Every water softener comes with its cleaning instructions. So always ensure you read and understand the manual guidelines for cleaning your water softener brand.
Some manufacturers give elaborate instructions on how you can clean the water softener brand.
STEP 1
Always follow the instructions of the manufacturer and ensure you set the unit of the softener in bypass mode. When you set it in this way, water will flow slowly thus, giving you the time to clean the softener unit thoroughly.
STEP 2
Disconnect all the lines attached between the brine tank and the softener unit.
STEP 3
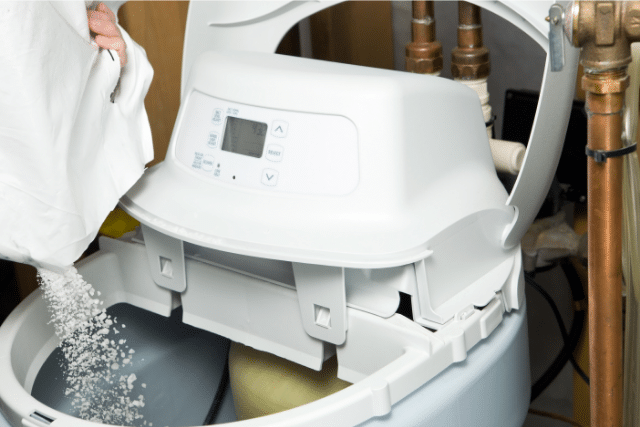
Add a resin cleaner to your water softener unit to replace the magnesium and the calcium ions as well as the sodium ions.
Then ensure that the resin cleaner is specifically made for the removal of mineral buildup. If you don’t have a resin cleaner then you can get an iron OUT rust stain remover.
Meanwhile, if you notice that your resin beads contain an excess of one mineral, ensure you choose a resin cleaner that is specialized for that particular need.
Because some cleaners only remove a specific mineral like the iron that destroys the system. Then you can decide on the best time to do your cleaning after choosing your cleaner.
STEP 4
Check through the instruction manual as provided by the manufacturer then pour the required amount of the cleaner into the resin/brine tank.
However, if your water softener unit doesn’t have a brine tank, pour the cleaner into the salt tank but ensure that the salt content is low.
STEP 5
To turn the regeneration control knob to a counterclockwise position, use a flathead screwdriver to turn it.
Find the knob, it is located at the control valve. Once the system is set to a regeneration mode, it will manually be recharged or the resin bed will be regenerated.
Regeneration reverses the water flow to remove first and all kinds of debris in the unit. The sodium ions are added into the mineral tank to help clean the resin beads.
STEP 6
Repeat the regeneration process again by refilling the brine tank with a new resin cleaner. Then re-run the regeneration process so as to remove the remaining minerals.
Assess the resin bed and if it still has such unwanted minerals, re-run the regeneration process again.
STEP 7
Rotate the regeneration knob to a clockwise position so as to restore the standard settings of the softener unit.
STEP 8
Now that you are done, flush the water out. After flushing the water out, shut the control panel and then, allow the tap to run for about 10 minutes to completely remove the resin cleaner thoroughly from the softener unit.
STEP 9
To be sure that your unit is functioning, you need to repeat the processes regularly.
However, you might need to do the regeneration process more frequently especially during summer because more water will be used in this period.
In conclusion, the best time to clean a resin tank is when it is running low on slat so that, you do not have to offload all the salt. Cleaning your resin tank can be tasking but it is quite essential.


